
Section 1 of this article describes how to use Cloudinary remote pictures in GatsbyJS projects using GraphQL queries. In this second section, you’ll learn how to —
- Utilize distant photos saved in Cloudinary and sent via a content delivery network that is optimized (CDN).
- With gatsby-image, you can serve fluid or fixed images.
- With gatsby-image, render images for responsiveness and optimization.
- Cloudinary can help you transform those images.
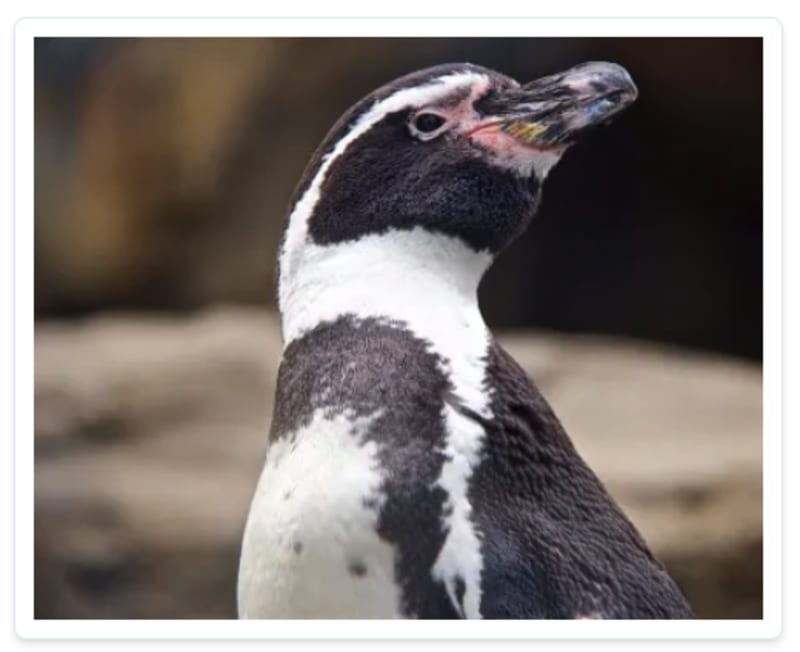
For e.g., we can rapsidly modify the image of this penguin:
This section walks you through two processes in particular:
Using the “getFluidImageObject” API of gatsby-transformer-cloudinary, fetch an image from Cloudinary and render it with gatsby-image. Any image in your Cloudinary account can be retrieved. Furthermore, even after applying the Cloudinary changes that you provide, the API can still use gatsby-image to optimize that image during the construction process.
This image-fetching process requires no GraphQL queries.
With Chakra UI, you can design a user interface and typography.
Steps to Get Started
You must have Gatsby.js installed with npm on your system before you begin. For further information, see Section 1’s Installation part.
Also, use the default GatsbyJS starter to build a new GatsbyJS project. Type:
gatsby new gtc-demo-2Clone this branch of the project mentioned in Section 1 instead.
Setup of Project Configurations
Follow the instructions in the three subsections under Setup of Project Configurations in Section 1 to — if you haven’t already.
- Sign up for a Cloudinary account.
- Create the gatsby-config.js file.
- Variables for the environment are added.
Page Layout Design
You’re now ready to start building a webpage and its design.
To begin, use the following command to create a development environment:
gatsby developAfter that, copy the files from Section 1 into the project’s components and pages directories.
Image Fetching With getFluidImageObject and getFixedImageObject APIs
Despite the fact that both “getfluidImageObject” and “getFixedImageObject” retrieve photos from Cloudinary accounts that have multiple or chained modifications, the two APIs differ in the following ways:
“getFluidImageObject” delivers fluid images with the breakpoints you specified, or breakpoints with a maximum width of 650 if none were specified.
getFixedImageObject returns fixed-width images, transferring them via asynchronous function calls to the gatsby-image “<Image/>” component’s “fluid” or “fixed” property.
There is no requirement for GraphQL queries because both APIs fetch images in a single asynchronous transaction.
Making a Webpage with a Single Image
Create a webpage that includes an image that was obtained using “getFluidImageObject”. Use the same arrangement as in Section 1.
The gatsby-transformer-cloudinary transformation settings “f_auto” and “q_auto” optimize the quality and format of images by default.
GatsbyJS generates pages from the src/pages directory’s JavaScript (JS) files.
Perform the following actions:
- In src/pages, create a single.js JS file. Single.js is added to the /single route by GatsbyJS.
- Use the following code to import the relevant modules into single.js:
import React, { useEffect, useState } from "react"
import Layout from "../components/layout"
import SEO from "../components/seo"
import { getFluidImageObject } from "gatsby-transformer-cloudinary"
import Image from "gatsby-image"
import { Box, Heading, Text } from "@chakra-ui/core/dist";- Create and export a SinglePage functional component. Get a single Cloudinary image with a public ID of your choice using the function. Below is the code, in which the public ID is gatsby-source-cloudinary/penguin:
const SinglePage = () => {
    const [fluid, setFluid] = useState(false);

    useEffect(() => {
        async function getData() {
            const res = await getFluidImageObject({
                public_id: "gatsby-source-cloudinary/penguin",
                cloudName: 'chuloo',
                originalHeight: 400,
                originalWidth: 500,
                transformations: ["e_replace_color:purple", "a_hflip"],
            });
            setFluid(res);
        }

        getData();


    }, []);

    return (
        <Layout>
            <SEO title={"single"}/>
            <Box>
                <Heading as={'h1'} size={'lg'} m={5} textAlign={'center'}>Single Fluid Image</Heading>
                <Box maxWidth={[350, 400, 500]} mx={"auto"} shadow="md" borderWidth="1px" rounded={'lg'} p={3}>
                    {fluid ? <Image fluid={fluid}/> : "loading..."}
                </Box>
                <Box my={30}>
                    <Text>This is a single image sourced directly from Cloudinary. This image can be any image in your
                        Cloudinary account, the public ID of the image is required to source this images for use in
                        gatsby-image </Text>
                </Box>

            </Box>
        </Layout>
    )
};

export default SinglePage
“getFluidImageObject” is an asynchronous function in the above code that is called by “useEffect” on page load. After the method returns the picture, you use useState to save it in the component’s “fluid” state.
Then, in the object argument of getFluidImageObjects, you supply the following keys:
- public_id: The public ID of the Cloudinary image
- cloudName: The cloud name of your Cloudinary account
- originalHeight: The height of the image to be fetched
- originalWidth: The width of the image to be fetched
- transformations: The transformations Cloudinary applies to the returned image
View all of the keys, as well as their optional and mandatory arguments.
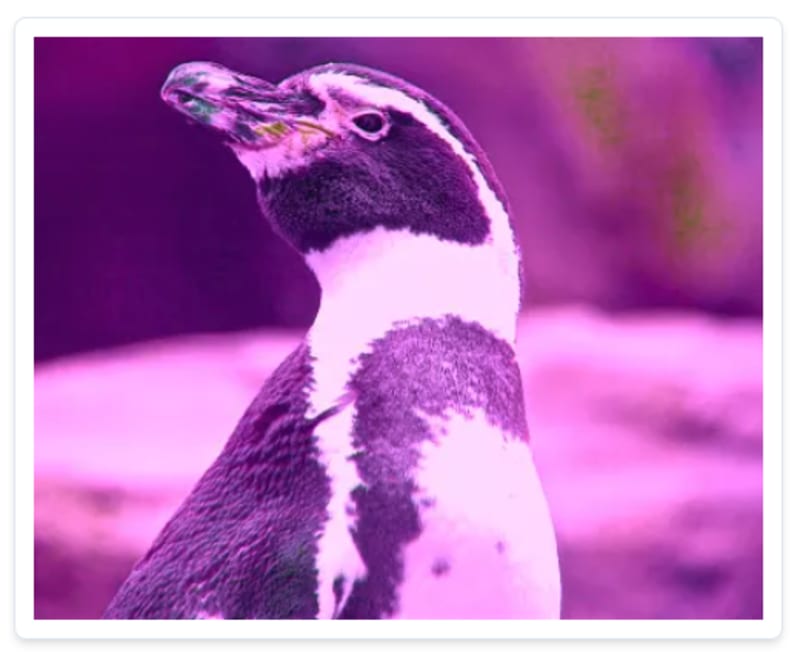
With the “e_replace_color:purple” and “a_hflip” parameters Cloudinary transformations, “getFluidImageObject” passes transformations in the transformation’s key to add a purple effect and to horizontally flip the image.
With getFluidImageObjects, you can fetch with gatsby-image any image in your Cloudinary account for display on the page.
Before the modification, the image looks like this:
After transformation, it looks like this:
gatsby-image lazy-loads images that are sourced with “getFluidImageObject“.
Update of Homepage
Finally, add a button to the homepage that will take you to the image you just found. To do so, change the “IndexPage” component in the “src/pages/index.js” file to look like this:
import React from "react"
import { graphql, Link, useStaticQuery } from "gatsby";
import Layout from "../components/layout"
import SEO from "../components/seo"
import Image from "gatsby-image"
import { Box, Button, Heading, Text } from "@chakra-ui/core/dist";

const IndexPage = () => {
    // fetch images
    const data = useStaticQuery(graphql`query BannerImage {
      bannerImage: file(name: { eq: "7" }) {
        cloudinary: childCloudinaryAsset {
          fluid(transformations:["e_grayscale"] maxWidth: 1500) {
            ...CloudinaryAssetFluid
          }
        }
      }
    }`);

    const bannerImage = data.bannerImage.cloudinary.fluid;

    return (
        <Layout>
            <SEO title="Home"/>
            <Box mb={[10, 20, 100]}>
                <Heading size={'xl'} m={3} textAlign={"center"}>Responsive Banner Image</Heading>
                <Box>
                    <Image fluid={bannerImage}/>
                </Box>
            </Box>
            <Text my={5}>Click any of the buttons below to see the gallery or single Image with
                the <i>getFluidImageObject</i> API</Text>

            <Box>
                <Button variantColor={'teal'} mr={10} mb={[2, 0, 0]}>
                    <Link to="/gallery"> Gallery Images</Link>
                </Button>

                {/_Button to single page with getFluidImageAPI_/}
                <Button variantColor={'green'} mb={[2, 0, 0]}>
                    <Link to="/single">API Image</Link>
                </Button>
            </Box>
        </Layout>
    )
};

export default IndexPage
Chakra UI styles the components in the above code for a responsive layout and responsive typography, with mobile, tablet, and desktop breakpoints.
To see the new look of the webpage, restart the development server.
Have you noticed the image that has been loaded slowly?
Here’s a screenshot of the Netlify-deployed program for comparison. The whole code is available on GitHub.
Conclusion
You now know how to get photos from Cloudinary into gatsby-image for GatsbyJS applications using “getFluidImageObject”. In a similar way, “getFixedImageObject” retrieves fixed pictures for gatsby-image.
Section 3 will show you how to add a dark mode to the website as a toggle and convert it to a progressive web app (PWA) with only a few lines of code. It’s incredible.
